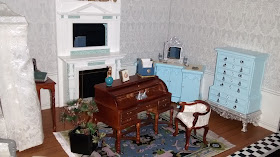
Pages

Monday, 28 November 2016

Santa's Work Shop in print on the Dollshouse World Magazine

Hello everyone,

How are you all? Hope you all had a great weekend. Time for Christmas once again. We spent the whole weekend decorating our home and the kids loved it. I also wanted to welcome a new follower to our blog Karin McMullen 

Before I continue I wanted to announce the the lucky Winner of our free give away. So the winner of November's Give Away is Denise Cole. Please contact me with your details so I can send it off to you. In just a couple of weeks we will be having another free give away. Thank you all for participating. 

Santa's Work Shop

So Santa's Work Shop once again has made it in print on the Dollshouse World Magazine January 2017 Issue 292. It has been 4 years since I have completed Santa's Work Shop and I have to admit it brings such sweet memories especially of my little Leah who was just a new born baby.


Article on the Dollshouse World Magazine

For those who would like to read the article A Special Magic in Santa's Workshop just click on the title link. 

I never tire of looking at the house and it always pleases me when a Dolls House Magazine asks me to publish an article about it. I know that Santa's Work Shop has still so much to offer and I still have to share so much about it. 

Here are some pictures of it.

Inside Santa's WorkShop

The Work Shop


Santa's Quarters


In the mean time I am working on a small Christmas Shadow Box. A few years ago I had made a room box but I am not very pleased with it so I thought of changing it, use less items and try a new Shadow box. I still have plans for the room box with another project. Also if all things go on as planed I am thinking of making a big Christmas project some time in late Summer which will be Santa's House and a Christmas Shop. 

Also like the years before we will be having a Christmas Advent Calendar 2016 with some great miniature tutorials and projects. So on 1st December you can open your first door. I am sure you will find it useful. 


So this is all for today. I will be sharing with you some new additions I have for the Queen Mary's bedroom diorama. So keep tuned for the next update.

Take Care and See You Soon.

Hugs,

Rebecca xxx

Sunday, 20 November 2016

Making the Ceiling and lights for The Queen Mary's Bedroom

Hello everyone,

How are you all? Hope you are all fine and have enjoyed your weekend. I haven't posted as regular. Had a very bad cold which kept me away from my play time. Also I have to say that I have a new member that joined my family. Yeps I have a 5 week old puppy. She is really sweet. A baby Chihuahua. Trust me not to get the smallest dog. A miniature for a miniaturist.  She needs some extra attention just like a new baby.

So for the past week I have finally finished the ceiling and lights for the Diorama.


I never got to see the Queen Mary's dolls house in Windsor Castle but I have been through books and the details are amazing. One thing that always impressed me was the ceiling and the very obvious Chandelier.

Queen Mary's Bedroom
There was no way I would get a chandelier looking anything like the one in the real room. So instead I have improvised. 

I had one of these six armed ceiling lights and I thought it could have an uplift.


It took me hours and days to finish it off. It was the first chandelier that I ever made. I might use a different method eventually but I am pleased with the results. I have beaded it all and used tiny glass beads and also crystals.


When that was done I was pondering how I was going to make the beautiful ceiling. The kit didn't come with one so once again I had to see what I could find.

I came across a nice high definition picture of a ceiling which I believed was just right for my project. Took some measurements  and printed the picture in a poster size which took me almost 6 A4 sheet papers.

Printing the ceiling
Now the tricky part was how to fix the picture to the ceiling which is angled in four sides. And besides all that I still had to add the lights .

The ceiling was going to be slightly difficult to work with as the ceiling itself wasn't straight as it had 2 supporting beams. So the only thing I could think of was adding  a piece of mdf wood with the same thickness of the support beams. 


With that I took the measurements. I have stuck the ceiling paper to a cardboard so it would be much neater and stronger and slowly I started to stick the ceiling to the roof inside.

Sticking the paper the ceiling


I was over joyed that the ceiling looked so perfect with the measurements and all. It was just meant for it I guess.


When that was done I was very anxious to put the top on top of the room. I wondered if it would look up to standard. But once it was there I was relieved to see it in it's glory.

Here are some pictures with the room and it's new ceiling and chandelier. 


So I hope you like my Queen Mary's Diorama so far. 

Before closing this post, I wanted to announce that we have another free give away for the month of November. We have the ready made miniature readable book called The Story of the Three Bears.

Free Give Away.
All you have to do is

1) Be or become a follower of our blog.
3) Leave a comment on this post so I can add you to the draw.

Closing date will be on 26th November 2016. The lucky winner will be announced shortly afterwards,

So  this is all for today. Hope you have enjoyed what I have done so far. 
Keep tuned for the next update on our projects.

Take Care and see you soon.

Hugs,

Rebecca xxx

Wednesday, 9 November 2016

The Queen's Bedroom Diorama

Hello everyone,

November! Time does fly. Soon we will be preparing for the Christmas Cheer. Hope that everyone is fine and is having a good week. It has been stormy for the last few days but I won't be surprised if we will still have some sunny warm days ahead of us. With the start of November we are setting off for a new project. 


The Queen Mary's Dolls House
The Queen's Bedroom Diorama
A few months ago I had shared with you my Queen Mary's dolls house Royal collection bedroom furniture pieces. The pieces are replicas made by the Dolls House Emporium with the Royal permission.  I am very proud of having all of it. I didn't know what I was going to do with it. At first I thought it was a good idea to add them to a nice rich dolls house but knowing the sizes of most of the dolls house rooms, I was pretty sure that they wouldn't fit in one room.

The decision was quickly made up for me as soon as I came across a brand new original kit by the Dolls House Emporium of The Queen's Bedroom Diorama. 

The Queen's Bedroom Diorama
I was quite impressed with the kit. It never crossed my mind that it would come fully decorated both inside and outside. I love how the outside is decorated just like the real Queen Mary's Dolls House. All four wall are decorated and it is just beautiful.


I was impressed how big the room is. It measured  55 cm wide without the outside end bits. It is 29 cm high without the roofing and 28 cm in depth. Quite spacious. I already had big plans to add more furniture to make it look a bit more like the real bedroom.


It was a pity that DHE had only made a few of the furniture pieces of the room. So after gluing up the walls, I am still figuring out how to add the lights and decorated the ceiling part as it is quite plain in white compared to the queen's bed room.

Ceiling of the room
So today I had a ball. I opened all the boxes of the furniture to add to the diorama. I was totally shocked with my new discovery. There is no way that I would be adding more furniture to the room. I am speechless. The Diorama is huge and the furniture pieces fit exactly. Now I can understand why DHE didn't make all the furniture pieces. There was definitely no space. This has only made me wonder and more anxious to see the real Queen Mary's Dolls House in Windsor Castle. I asked myself if the one room of the Diorama is big and only these few pieces fit, how big is the original room of the Dolls house in Windsor????? I just can't imagine and I have to find away to see it when hopefully I will get to go to the UK. It is definitely on my To Do List. 

So I added all the furniture and accessories. They are beautiful but I will be adding more touches to the furniture for sure. There will be more accessories and I already have in mind what I will be making myself. I will try to add a lot of detail close enough to what the real one has. There is no way I can make an exact replica ans the furniture is still not a perfect match.

I have been doing a lot of research of the room . I have added a small console table at the foot of the bed. It is not an exact match but being in Walnut and quite slim I think it does look right. It is a DHE dolls house piece which today is no longer available. 


So here are some pictures of the Diorama with the pieces that I had collected. There is still so much that I want to add.


Hope you like what I have done so far. I should start working a bit on the decor and make it  look a bit more realistic.

Keep tuned for the next update on this miniature project. I am really excited about it.

Take Care and see you soon.

Hugs,

Rebecca xxx