Hello everyone,
So here we are once again. Hope you are all having a good week. I just popped in to give you a quick update on the J.R. Art Gallery project. I am enjoying every moment of it. I have at least to make some sort of miniature or addition to the building everyday, even if it is something small.
Before I can really work on the inside of the building or finish the last touches of the outside I have to finish underneath the staircase. This time I went for something a bit different. Instead of opening the outside wall, I decided to open the inner wall so the artist has access to the underneath staircase from the gallery.
 |
| Underneath the Staircase |
As there isn't really going to be access to decorate it or to fill it underneath the staircase I spent the weekend making an artist sink to fit the tiny tight room. There was no way I was going to find what I imagined so I sketched the furniture piece, took measurements and before I knew it the sink was ready. I had one of these bathroom ceramic sink basins which fitted in nicely in the wooden cabinet.

I was really pleased with the scratch built sink and I was eager to decorate it. My box of polymer clay is always handy and I got to make some paint pots, paint brushes and other accessories that are suitable for it.
 |
| Hand made accessories |
Once I placed the accessories in place it was time to give the sink a new look with splashed paints all around. Yes..... I have gone overboard some would say or that the artist is very messy. I can assure you that the artist is very clean and tidy and he would definitely not leave a mess like this. So why did I even bother to do so????....It's very simple........If I didn't, it would never draw one's eye to look into the doorway underneath the staircase.
Rest assured that I know what I am doing and believe me I enjoyed messing it all around. The artist wasn't very pleased with my behavior.
After that I started wall papering the inner walls and flooring. I have used some wall paper that I had stashed and never used and the flooring was actually one of my own designed papers that I printed.
I added the new abused sink in it's place and I liked it even more.
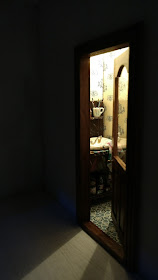
I added a small rice bulb to see how it would look like lit up once I closed the outer wall. I also painted the doorway and left it slightly opened.
And here is how the room would look like once the light is on. I was thrilled to see it all done and ready.
Now that this room is ready. I can start working on the gallery. At first I will start just adding the wall paper and flooring so I can continue finishing the building itself.
Hope you like what I have done so far. Keep tuned for the next update on this project. I am very excited and eager to continue.
Take Care and See You Soon.
Hugs,
Rebecca xxx


Very creative and a perfect addition to the gallery!
ReplyDeleteHugs, Drora
Thank you so much Drora. Glad you liked it. xxx
DeleteBeautiful!
ReplyDeleteThank you Megan. xxx
DeleteHi Rebecca - no idea why I have only just found your blog but so happy I have - seen you around for ages!! Saving you for a jolly good read this evening. Love your work. Marilyn
ReplyDeleteThank you so much Marilyn. I am so pleased that you found it interesting. x
DeleteMe encanta ese rincón!!! Entiendo que el artista esté un poco enfadado con el caos de pintura, pero me encanta!!!! :) ♥
ReplyDeleteMuchas gracias. Estoy de acuerdo con usted. Me encanta también. Xxx
Delete