

Hello everyone,
Just as I promised here I am again today. Hope you are all enjoying your weekend so far. Tomorrow is Easter Day. Kids are already up in bed waiting for the Easter Bunny! I also wanted to welcome three followers to my Blog; Georgina Wood, Julie and Sandra Morris. Welcome!
Don't forget that we have a free give away of two miniature bunny books. For more information and how to take part click On This Post.
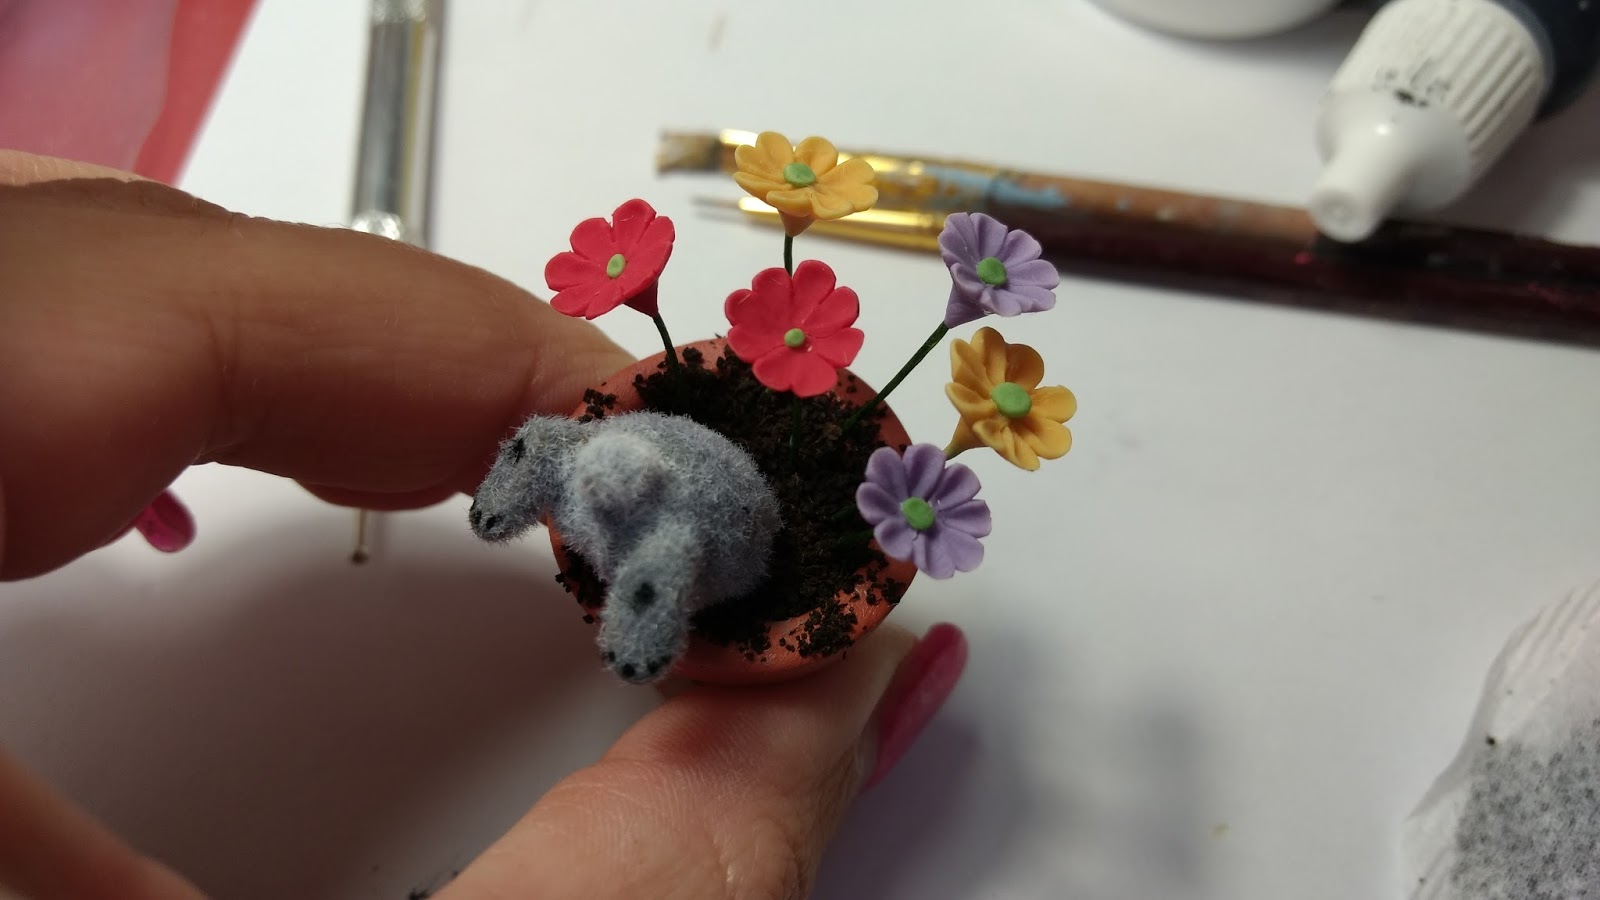
So today we have something a bit different a special. A miniature Tutorial to make this cute naughty bunny digging up a Pot made out of polymer clay.
 |
| Naughty Bunny digging up a Pot |
This cute little miniature could be used during Easter Time or just to add to your miniature garden.

To make this miniature you need:
1) a piece of scrap polymer clay.
2) a miniature terracotta pot.
3) Miniature Spring flowers.
4) Moss or greenery.
5) fiber powder (or trim wool)
6) acrylic paint
7) pva glue
8) tea bag
9) clay tools

Step 1: Start by filling the terracotta miniature pot with polymer clay. Don't fill it up to the brim. You can use any color that you want. Eventually it will be covered.

Step 2: Using the same clay. Make a ball. I have made it at about 2 cm diameter. Form it as a body of a bunny without the head. The important part of it's body is practically his bottom. So don't worry how it is formed. If you are using a smaller pot always go for a small bunny.

Put the body in the pot to check for size. Like I said before don't worry if it doesn't look nothing at all like a bunny.

Step 3: Make two small balls approx 5mm diameter to make the back hinds of the bunny. Shape the into very tiny shapes like doll feet. Don't worry if they are not perfect, This is a fun project.

Step 6: Using a denting tool see where you would like to add the bunny legs on the back side and using a very tiny piece of clay add the bunny tail in the middle. Here you can start shaping the body better and see how you would like your bunny bottom.


Step 7: With the flower stems make tiny holes where eventually the flowers will fit in. Don't leave the flowers there for baking. When you're done bake the clay as stating on the packaging of your polymer clay brand.

Step 8: After baking let it cool. Paint your bunny in the color that you will be furing it. I went for a grey color with touches of white.

I have used powder felt for this bunny. You can find this in most craft shops. Some even use this for nail art. If you don't have any don't worry. Get some wool and cut it very finely It will look pretty much the same

Step 9: Using a paint brush add pva glue to the bunny body. Don't cove the whole body with pva glue if you are going to be using more than the one color. I have choose grey and white. The bunny is in grey with a white tail and a white straight line down his belly

Then start adding the felt or wool. Keep adding until you are happy. Make sure that you haven't done too much as you might lose some of his details.

Using a fine paint brush and some black paint. Add the little details to his feet

Step 10: Cut out the flower stems to the right size you want your flowers to stand in the pot and add them to side of the pot.

Using a paint brush add pva glue where the soil and flower stems are. Don't worry if some pva glue goes around the pot. It will look more realistic.

Step 11: Open one side of the tea bag and let the tea granules out. I like using tea for soil. It looks very natural. Slowly add the tea granules in the pot.
You can add some greenery in the soil if you like, or fallen leaves. I like to use moss.

And here it is all ready to add to your project.


Hope you have enjoyed this miniature tutorial and hope you have found it useful. If you need more help please don't hesitate to ask me.
Here are some more pictures of the naughty bunny digging in the flower pot.


Before ending this post I want to wish you, your families and loved ones a very Happy Easter.

Hopefully next time when we will meet, I will be updating you all with the progress of the Woodcutter's Cottage, so keep tuned.
Take Care and see you soon.
Hugs,
Rebecca xxx
This is a very cute tutorial Rebecca, and your flocked naughty bunny has turned out Really well!
ReplyDeleteHappy Easter!
elizabeth
Thank you so much Elizabeth. I am so pleased that you liked it. Hope you enjoyed your Easter xxx
DeletePrecioso y divertido,muchas gracias Rebecca!!!
ReplyDeleteBesos.
Muchas gracias. Espero que lo encuentres util. Abrazos calientes xxx
DeleteThank you for this super cute tutorial.
ReplyDeleteHugs, Drora
Thank you so much Drora. Glad you liked it.
DeleteThanks for this great tutorial.
ReplyDeleteHappy easter.
Greetings Melanie
Thank you so much Mellis. I am so pleased that you liked this tutorial. xxx
DeleteThank you for the tutorial, it´s a very sweet and gorgeous project :)
ReplyDeleteThank you Alexandra. It is quite cute. Hope you enjoyed it. xxx
DeleteJaaaaa! Qué divertido! Gracias por compartir y feliz Pascua!! :)
ReplyDeleteEstoy muy contento de que te haya gustado este tutorial. Espero que tengas una gran Pascua xxx
DeleteGracias por el tutorial, muy lindo.Feliz Pascua :-)
ReplyDeleteEspero que hayas tenido una gran Pascua. Estoy muy contento de que te haya gustado este tutorial. Xxx
Delete