Hello everyone,
Hope you are enjoying your week so far. It has been quite busy in the last few days and there is still so much to do. Last weekend mother nature decided to throw a hiss at us. It was very cold, windy and rainy. My family and I decided to stay indoors so I was quite productive in My Miniature World. Sometimes it is just great to spend the whole weekend inside warm and cosy.
My Miniature World has been busy as ever. The blog page has reached over 101,000 views. I hope that you all find it interesting. It also helps me keep track of the progress of all my dolls houses. This week My Miniature World Group on Face book has reached over 600 members and My Miniature World Face Book Page has reached over 13,000 likes. Thank you so much followers, fans and friends for all your support and encouragement. I really appreciate it.
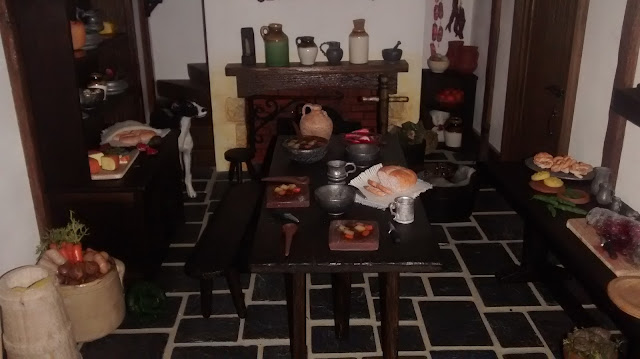
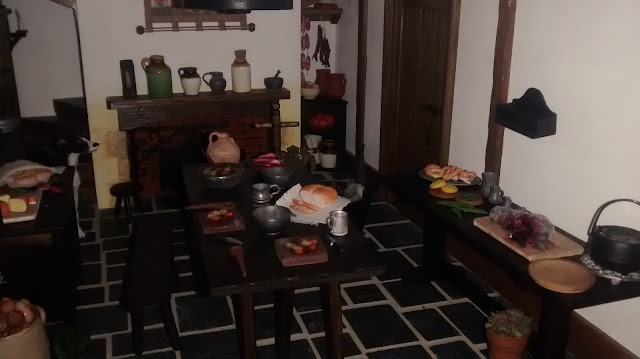
Today I will be sharing with you the complete Living quarters in Kate's Cottage.
 |
| The Living area in Kate's Cottage |
I am really pleased how this room turned out to be. I never thought that it would have looked like this. It is quite spacious and I have manged to fit all the items that I wanted. As I had a great weekend being inside, I spent most of it making miniatures and adding them to the room.
In Tudor times vegetables was the most common food. So I made quite a selection of vegetables and fruit, I have made carrots, turnips, potatoes, onions and a cabbage. I have made some fruit like strawberries, apples and oranges. These will be added to the other food stock that I made previously. I have also made some pottery vessels which were common in the period.
 |
| Vegetables, fruit and vessels. |
I have also made a small bowl of eggs.
 |
| Bowl of Eggs |
In Tudor periods it was quite common to have a bee hive to collect honey to use as a sweetener for food. I have made a miniature beehive. The beehive's style fits the era to date with a pottery base. I have made this beehive using polymer clay and then used string to make the cover.
 |
| Period Beehive |
Maybe you have noticed the little tiny room at the back which is behind the fire place underneath the stair case. I have decided to use the little nook as a food store or larder. I think it is just perfect to be used like this. Most of the food used to be salted or smoked to preserve them. I have decided to make a small little shelf with pegs so I could hang the food from them. The little pegs were made from toothpicks and cut to measure. I have stained it to match the wooden wall beams. Then I tried my hand making the food to hang from the pegs. I have made a hanging goose, some pork sausages and some red herrings. I am really pleased how they turned out.
 |
| Hand made shelf with pegs and miniature food |
In the larder I decided to add a corner floor shelf and filled it up with the miniatures that I made.
 |
| Shelf with food |
And finally I can say that the larder is quite full and just right.
 |
| The Larder |
 |
| The Larder in the corner underneath the stair case. |
The hutch is now filled with most of my miniatures too.
To make the washtub look a bit realistic I added some more detail. Using resin water and some soapy bubbles, I added a piece of material and it just looks right.
 |
| Washtub |
I also fixed the mantel piece of the fire place which needed some more accessories added to it.
So I guess this is pretty much the complete room. Maybe there will be a few more additions but it is pretty much done.
Here are some pictures of it, I hope you'll like it.
 |
| The table with the dinner |
 |
| My vegetables |
 |
| Sturdy sniffing the food |
 |
| The Larder |
So this is all for today folks. Hope you will find this interesting. Next time I will be sharing the finishing touches of Kate's Bedroom. Keep tuned for the next update.
Take Care and see you soon.
Hugs,
Rebecca xxx


Give yourself a pat on the back! You have done an excellent job! May I ask what you used to make the bubbles? Are they permanent? Also What you use for the floor ?
ReplyDeleteThank you so much. I really appreciate it. Yes the bubbles are permanent. I used soapy water for the bubbles and scenic water. Once dried it hardens so the bubbles remain. As for the floor I used real floor slabs and grout.
DeleteIt seems really stylish! And these details... You have good eye!
ReplyDeleteWarm greetings from cold and snowy Poland.
Thank you so much. I really appreciate it. Greetings
DeleteSo much detail Rebecca. You can see how much thought you have put into every corner.
ReplyDeleteThank you Janice. I am so pleased that you liked it. xxx
DeleteA lovely room with so many interesting details to look at . Truly a work of art. The dog is a nice touch. He's so cute. You are very patient to be doing so many tiny things. You have captured the soul of the era. I love all your creations!
ReplyDeleteThank you Lucille for your kind words. It is the first time that I ever created a Tudor period project and I am pleased with the out come.
DeleteWonderful work you have there and you have captured the period at it's best.
ReplyDeleteThank you so much Thomas xxx
DeleteFantastic. Your details are amazing. I really enjoyed all your pictures.
ReplyDeleteBetty
doll-college.blogspot.com
Thank you so much Betty. I am so glad that you liked it.
Delete