Wednesday 31 July 2019

Refurbishing the Conservatory for Pembroke Grange

Hello everyone,

Hope you are having a great week. Can't believe how fast the days go by and today we are saying goodbye to the month of July. Summer can be so short especially when you look forward to it every year.

During the weekends I am enjoying working on my new project Pembroke Grange. As I tend to work on the outside of the dolls house first, I thought it would be a good idea to start the renovation of my old conservatory which will be attached to Pembroke Grange.


My Dolls House Emporium Conservatory which I had for years and now has been discontinued for quite a while was a stand alone project. I always thought that one day it would be part of a dolls house but that never happened. At this time, seven years ago I was hoping that the conservatory would be part of my Wood Cutter's Cottage but that never materialized.  The conservatory was quite pretty and I remember making my own flowers and plants for  it. For those who would like to see how it was before you can visit the blog post The Conservatory with New Plants and Flowers.

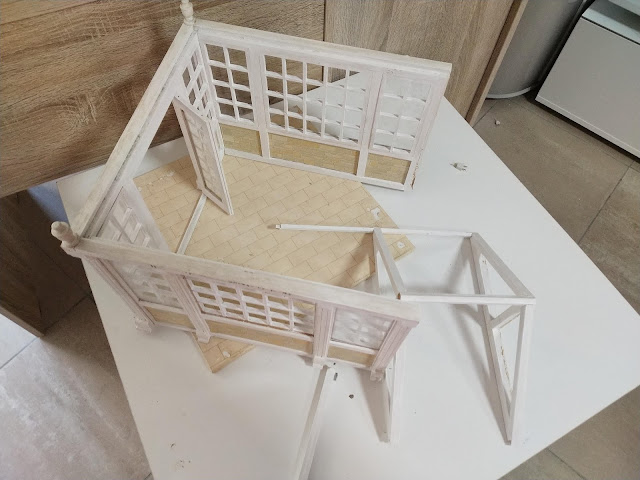
By time and neglect The Conservatory lost its charm. Totally my fault for leaving it in disarray. Pembroke Grange was the right project for it and so I brought out the conservatory from its hiding place to give it its refurbishment and spark once again.


I cleared out all the plants and furniture pieces from the conservatory. It is heart breaking when I get to restore or refurbish a project. It feels like I am wiping cleaning history and memories of when it was being done. Remaining in focus and knowing that this is for the best I dismantled it all and pealed away the paper. 


The back wall was removed and a new coat of paint was given to the conservatory. It was already looking better especially when I have placed it next to Pembroke Grange.


To give it a bit more color I went for a marbled checkered tile flooring that suited it very well. The interior door leading to the conservatory fitted nicely and added more depth to it.


I am glad that I took the plunge to refurbish the conservatory.  The stand alone room deserved to be part of a bigger project.

Here are some more photos of the conservatory next to Pembroke Grange. 


I can't wait to start adding furniture pieces, accessories, flower pots and plants.  Hope you like the new look so far of the conservatory. Make sure to keep tuned for the next update on Pembroke Grange.

Take Care and See You Soon.

Hugs,


Rebecca xxx

Wednesday 24 July 2019

Tri-ang Dolls House No. 76.

Hello everyone,

How are you all? Hope you are doing well and that you are having a great week. I still can't believe that July is at its end. Summer is too short! I do enjoy having the kids with me and spend their summer break with them.

The new project is going well so far but today I wanted to share with you a new arrival to My Miniature World's Collection. The Tri-ang Dolls House No.76

Tri-ang Dolls House No 76.
Do you folks remember I had shared with you a huge big box that arrived on my birthday 12th June?  
 

I guess you could all tell it was probably a dolls house. It arrived safe and sound from the U.K. and the house is in immaculate condition. I have always wanted one of those British Tri-ang Dolls Houses just for the sake of having a 1:16  vintage scale model.

I have done some research of my own. Tri-ang dolls houses go way back between the 1930's and the late 1950's.

A picture from an old catalog


The description from the 1957 catalog reads:


'A fine house with a hinged front for access to the two large rooms. Curtains fitted to the opening metal framed windows. Sun-porch and seat with tiled floor. Complete with built-in garage fitted with opening doors. Red tiled roof.'

A Picture from the 1955 Catalog
I am pretty sure that my dolls house is the 1950's version. I can tell from the coloring of the windows, the coloring of the roof and even the logo at the Back. 

The No. 76 comes with two large rooms a front terrace and also a spacious garage.


One of the features that I like about this house is the hinged deep opening front. 


The two rooms contain the original wall paper and flooring which will remain intact even if they are slightly torn here and there. 

The ground floor

The first floor

The right hand side of the 1st floor


The right hand side of the 1st floor


The outside is in a very good condition. You can see some wear and tear over the years but that is to be expected after all this time. 


The roof is in a very good condition with it's vibrant red color and with it's original two chimneys.


At the upper back of the house, it still contains the Tri-ang logo.


The cardboard beam work in the front is completely intact.


The original hand painted floral pattern which is a Tri-ang feature in most of their dolls houses is still visible and sharp.  


All metal windows are functional with their original green and white colors and not to mention that they all contain their original spotted curtains. 


Another feature that I love about this dolls house is the front terrace which takes you to the main entrance.  It still has it's original seat at the back and the tiled flooring. 


We can't forget the spacious garage that there is on the other side with it's original hinged doors, door knobs and flooring.


It is very special to me and to find one of these in a mint condition is a bonus. No renovation works will be done to it. I can't wait to start furnishing it with vintage furniture pieces and accessories. 

Also I wanted to tell you that on the same day that I received mine,  my dear friend Jose also got his Tri-ang Dolls House No 61. We spoke of getting a Tri-ang and so here they are.


José's  Tri-ang dolls house No. 61 is much older. It goes way back from the 1930's with it's original black metal windows. The No. 61 is very similar to No 76. It is slightly smaller with some differences to the front. Knowing José he will be leaving it in its original state as it suits his style and purposes.

Visit José's Blog The Rust & Steel Miniatures to see the Tri-ang Dolls House No. 61. I am sure that he will be doing something special with it like all his other projects.

I will be keeping you updated from time to time with the additions to the Tri-ang dolls house so make sure to keep tuned.

Take Care and See You Soon. 

Hugs,


Rebecca xxx

Friday 19 July 2019

The Start of a New Project - Pembroke Grange

Hello everyone,

Finally Friday! I hope you all had a great week. I am so looking forward to the weekend as I have so much to do especially on my new project. 

Last weekend I got to start my new dolls house project called Pembroke Grange. Pembroke Grange is another Dolls House Emporium house which has been long discontinued. 

A Picture from an old DHE Catalog 

Pembroke Grange has a strong resemblance to 'Longbourn' house belonging to the Bennet's Family in  the 'Pride & Prejudice' TV Series back in 1995. 'Pride & Prejudice' is indeed one of my favorite novel's by Jane Austen. 

Longbourn House in Pride & Prejudice 


I won't be surprised that this house was the inspiration for Pembroke Grange by DHE.

Longbourn was the only thing that I pictured in my mind when I saw Pembroke Grange, so there was no doubt that I was going for a Regency Period House. 

I started off by dry building the house so I can get more familiar to it and study the interior.


The house itself has six spacious room but the interior was not to my liking. I knew immediately there was going to be some kit bashing. The first thing I hated in the house was the interior side walls. I hated the idea that the side walls were reduced for passage ways instead of having interior doors.  I realized that  two side walls were right in front of the windows in the front panel which didn't make sense. Also I didn't really like the staircase; there was something odd about them.


An addition to the house I wanted to add my neglected, long forgotten, standalone conservatory. It was about time that the conservatory was part of a dolls house and Pembroke Grange was just perfect for it. 


I started off by changing the side walls, removing a room or two, opened the left side wall for the entrance to the conservatory  and as suggested by my dear friend José, I gave more air to the staircase by giving more space to the hall way on the first floor.  

It took me a while to do, but it was definitely worth it! 


When those were done. I gave an undercoat to the wall panels and flooring. I had my floor covered with wood. There was quite a lot to paint.


As soon as the paint was dried, I built the house and tried out the new interior doors.


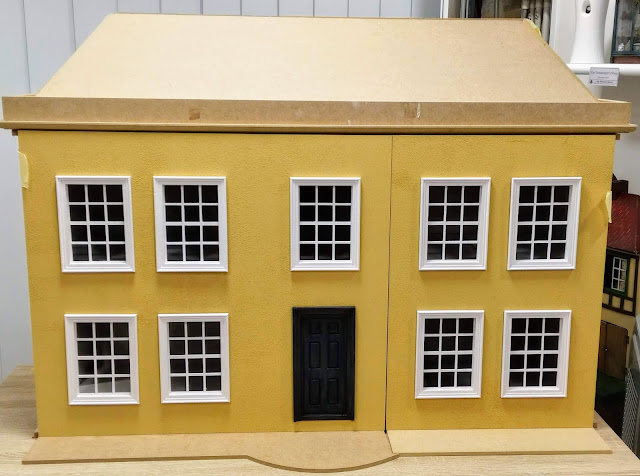
I painted the outside of the house which still needs a lot of detail and shading and also painted the windows and the front door. 


This is how Pembroke Grange looks like so far.


I can't wait to continue working on the house. Still lots to do. I am waiting for supplies so in the mean time I can continue working on the conservatory. I need to strip it down and make it fit to this building which all this will be happening during this weekend. 

Hope you like what I have done so far. Make sure to keep tuned for the next update on Pembroke Grange. 

Wishing you all a happy weekend.

Take Care and See You Soon.

Hugs,


Rebecca xxx