Sunday, 13 September 2015

A few accessories and furniture for Kate's Cottage

Hello everyone,

How are you all? I hope you have enjoyed your weekend and are all doing well. I have been extremely busy with my everyday life, keeping up with my miniature orders and preparing the school books and stationary for the kids. Summer is still pretty here and it is still very hot. 

I would like to tell you that My Miniature World Shop at etsy has a new range of miniature ceramics, new miniature books and new hand painted pieces. Now we offer over 230 different accessories and in a few days we will be adding more to our selection.

I also would like to thank the face book fans of My Miniature World as we have reached over 8,340 likes. Thank you so much for your support.  I really appreciate it. So keep tuned as soon we will be having another free give away.

As I said before I was quite busy and didn't have much to do what I had planned. I am waiting for some supplies which seem to be taking forever to arrive. In the mean time I still added some pieces of furniture and accessories.

The living area
 Firstly I wanted to introduce you to the residence who will live in Kate's Cottage. Catherine and her son Luke. The names were both quite common in the 1550's and 1560's. As the house's original name is Kate's Cottage it was only fair that the lady of the house was to be called Catherine. On the other hand even if the name Luke was used in the Tudor times it holds a very sentimental meaning to me. At the beginning of this project on 19th August 2015, I lost one of my youngest cousins to cancer and his name was Luke. So I think the little lad will hold a very special place in the project and it will be something to remember my dear sweet 19 year old cousin.  


Catherine and Luke
The story line behind Catherine and Luke

"Catherine had a rough start in her married life. At first it was all bliss. Both Catherine and her husband worked in the field and had a small little farm. They were both in their twenties, respected one another and were respected by the villagers. They sold their crops and dairy in the market which was enough for them to live a good normal life. One evening, after a day's work in the field, her husband never returned home. Some say that he was attacked by a wild beast. Others say that he was slain by an evil hand. Catherine had found his lifeless body lying in the filed covered in blood. It was like a lightning bolt in a Summer's day. It was very hard for Catherine to carry the load all by herself. She had to look after the crops and the cattle. Sometimes the neighbors came to help. When she was on the verge of giving up she realized that she was with child. It was her husband's last gift to her. She did her best to keep on going, She picked up the pieces that remained of her life.  She woke up early in the morning, fed the cattle, went to the market and worked in the field. She promised that she will do everything she could to give a good life to her unborn baby. 

Finally the day came when she gave birth to her son. Folk spoke from behind her back and she could hear whispering when she passed from the village. Catherine didn't care what people thought of her or of what they said. She held her head high. Her son Luke carried the name of his father, her late husband. Life was not easy but every minute was worth it.  Like always gossip died down and Catherine kept up with her field and cattle that provided with their daily living. Tiny Luke turned four and grew up to be a fine good boy, that adored his mother with all his heart. Catherine would do anything for him even sell her soul if needed. He was her life line. Her life depended on him as much as he needed her,  for not only he was her night and day but a splitting image of his father; the only man she ever loved." 

For the fire place I have made the firedogs with a smoke jack spit, a drip tray and the cooking roast.
It was the first time that I ever made something like this and I am very happy how they turned out.
I have made them with polymer clay and for the spit I used a tooth pick. I still need to add the wood and maybe even a little glow for the fire.

The fire place accessories made out of polymer clay


The first pieces of furniture arrived for the room which are the primitive bench, the trestle table, food dresser and two small stools. These pieces are from Ashwood Designs.

They are perfect replicas for the Tudor times. While doing my homework and studying the Tudor period, I have learnt that common people usually didn't have a lot of furniture and when it came to chairs you will be surprised they never came in pairs or in sets. There was not such thing as four chairs or six chairs around the table. It all deepened on how many persons lived in the house.

So I went for a primitive bench do go with the trestle table and a small child's stool.


trestle table and bench


Child's bench
  For the little children it was quite strange to have a small stool but this particular stool was not meant to be sat on but to stand on. Children used to eat standing up. They would stand on this stool so they could reach better by the table.

Luke on his Child's stool by the table
 I also got a spinning stool which I am sure it will find it's use and purpose in the project,


spinning stool
I also got the food dresser. You can see that the cupboard  doors are strips of wood. This is to air the stocked food to keep it fresh,

Food dresser


I also got some white metal miniatures which will fit in perfectly. I still need to hand paint them and I am sure they will look just right when all set and done,

White metal accessories that still need to be painted
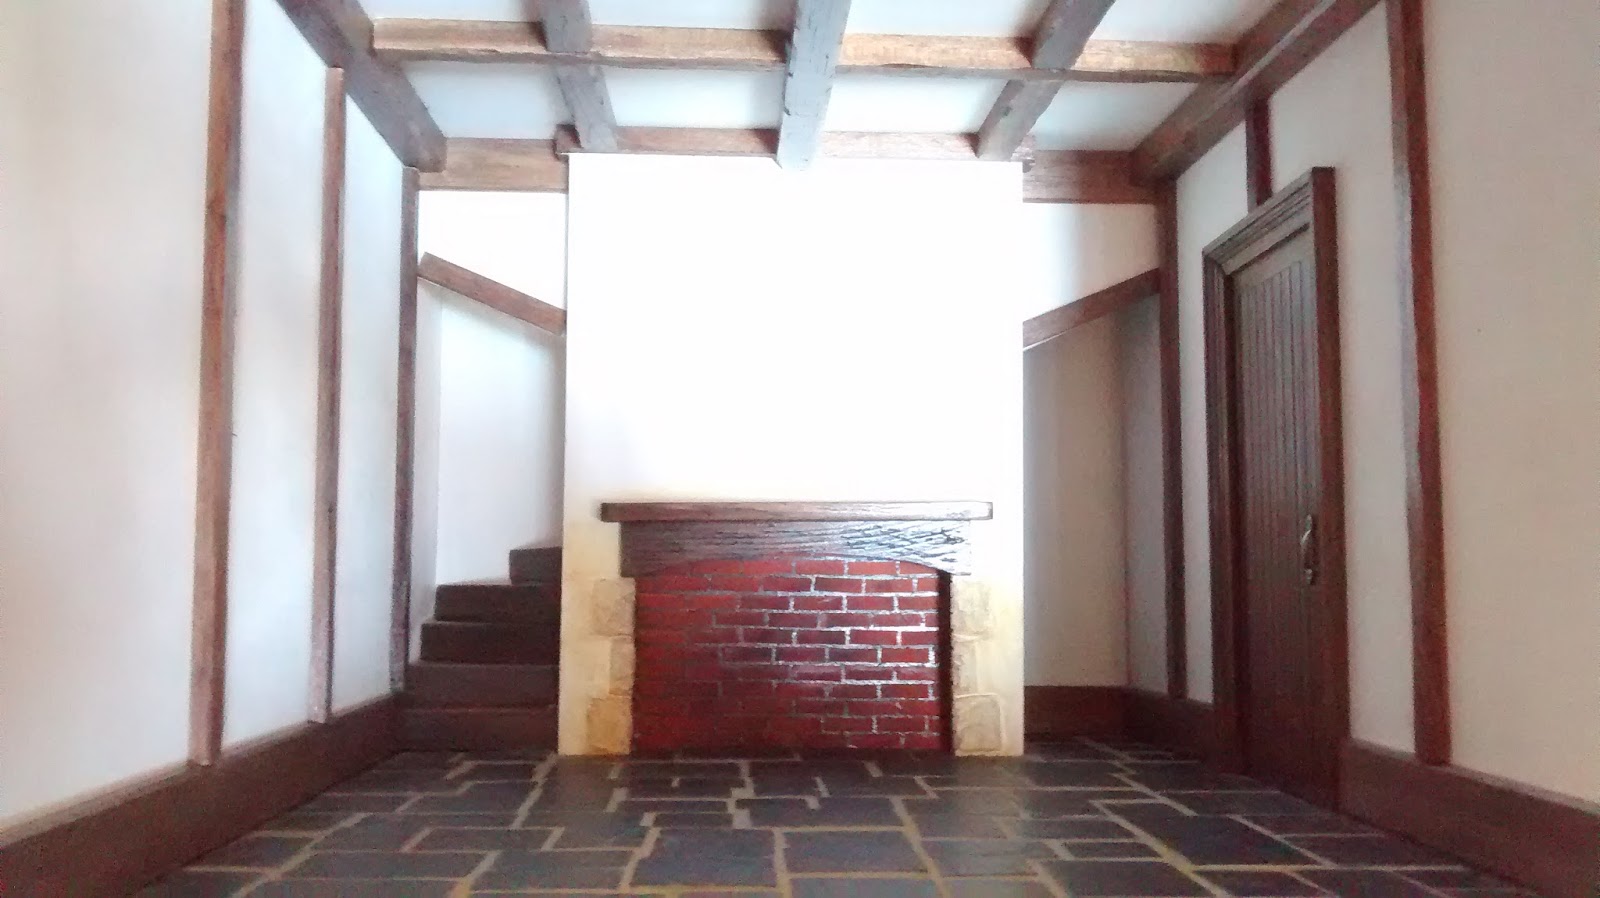
And here is how the room looks like so far.

The living area


Fire place
So this is all for today. I hope you liked what I have done so far and the little story that was built around this project.

Hopefully I will be finishing most of the outside so keep tuned for the next update.

Take care and see you all soon.

Hugs,


Rebecca xxx

Wednesday, 2 September 2015

New Project Kate's Cottage in Tudor Times

Hello my dear friends,

I can't believe that we have started September and with this month we start the new project. September is not a month that I love, it brings with it lots of anxiety especially knowing that the kids will start school. The weather hasn't changed at all but we are waiting for a storm next week.

So today I will be sharing with you the beginning of my new dolls house project called Kate's Cottage. It is one of those Dolls House Emporium kits that I have stashed a couple of years ago. It is another discontinued house and I am very lucky to own one. It is only a two room house but has lovely unusual features with lots of bits and pieces.

Kit pieces

Even with my experience through out all these years of building dolls houses, I am very very nervous with this one. It is my very first Tudor Dolls House that I ever started. I had gone all over the histories and done lots of research. I  had wanted to start it for quite some time but each time I try to bring it out I get cold feet. When I was sure that I could swim in the unknown waters I took the plunge to give it a try. 

I have realized that with this house it was not something that I could first build, paint, finish the outside and decorate the inside like I do with all my projects. This needed a little bit of thought. I started with a dry built to see that everything fitted in and to have a better idea of how to go around it.

Kate's Cottage


Ground floor

Top Floor
I started by painting the side walls and flooring.

Painting the walls
Being a small primitive Tudor house I went for real flag stone floors for the ground floor. They were quite simple to do and the pattern just came out alone.

Gluing the flag stones
When the real flag stones were done I grouted the flooring.

Grouting the ground floor
The grouting was fun to do and when it was all done and dried it looked even better.

Grouted flag stone floor
When the floor was done I started working on the main fire place. I distressed the mantel piece and stained it. I have bricked the back walls and the inside of the fire place with brick slips. Using black pastel color I have darkened the bricks to give it a used touch. I have bricked slightly the front of the fire surround by using a brick stencil, to give it a more realistic touch and distressed it with brown paint.

Distressing the fire surround
I was so surprised when I have placed it in the room. I couldn't imagine it looking any better.

Fire place


Fire place with completed flag stone floor.
After that was done. I stained the stair case that winds up behind the fire place chimney.

Stair case behind the fire place
When that was done then I started distressing the front door and some inside beams. I got some wood strips from a DIY shop in different thicknesses for the inside beam work.

To distress the wood I used a needle tool and crafts knife and then I stained them.
Distressing the wood of the outside door

When that was all done, I started the ceiling beam work which took me a few hours to complete with lots of cutting and measuring but I was trilled to see it all done.

Ceiling beams 


 I have also made some skirting and also started some beam work on the walls. The walls aren't completed yet but now I have a good idea how it all looks like. Once I place the hinges for the front panel then I can continue with the wall beams.

Wall Beams


And this is how the room look like so far. 

The first room


 There is still so much that I still need to do and add but I love how it looks. Being the first I think I did quite a good job.

I hope you like what I have done so far. Next time we will meet I think I can start working a little on the outside of the house. So keep tuned for more update's on Kate's Cottage.

Take Care and See you soon.

Hugs,

Rebecca xxx


Wednesday, 26 August 2015

1930's Bed Room for Tudor Manor

Hello everyone,

Once again we came to an end to another month. Time does fly by and soon we will be saying goodbye to Summer. I have been very busy with the kids as soon it will be time for them to go to school and start another new scholastic year. This  year it won't only be Matthias and Raquel to go, even my darling little Leah will start her kinder garden. It is so hard sending the little ones off.

I wanted to tell you that My Miniature World Group on Face Book has reached over 400 members. It is a very nice group where everyone can share their miniature creations and dolls house projects. I also wanted to thank all those wonderful persons that like and follow My Miniature World Face Book page. We have reached over 6,000 likes. Thank you so much for your encouragement.

Today I will be sharing with you something that I am really looking forward to work on even though it is not my next project.


1930's Bedroom
Like you all know the Tudor Manor is very special too me, especially knowing that it has the same age as I do and was built by the founders of The Dolls House Emporium. What makes it special that it has a vintage style and I just couldn't imagine something modern in it. So I thought about a 1930's -40's will fit in perfectly.

Some how you don't find the right pieces that you want or you imagine. I have done a lot of research and what I liked was real furniture and not miniature.  

The only person that came to my mind was Elizabeth from Elf Miniatures. It wasn't the first time that we worked together and definitely it won't be the last. I simply emailed Elizabeth and showed her two pictures of bedroom furniture that I wanted. I asked her if it was possible that if she could design them for me in miniatures.

Real bed room


Elizabeth, a wonderful person that she is, responded in a heart beat and the answer was a simple "Yes". After several emails with dimensions and working together, she started working on the kits. I was positively sure that I would be happy as a bunny, Elizabeth never let me down. During a few weeks she showed me step by step each piece that she was working on and if I was satisfied with the style and look. They where just perfect and they where even better than I imagined them.

Finally the day came when I got all the kits by post. Elizabeth sent me the knew instructions by email which were very easy to follow.

Elf Kits
 Piece by piece I started assembling them and staining them. 

Working on the kits
Every piece was cut perfectly and matching. It took me a few days to finish as I wanted them to be perfect as much as possible.

When all pieces were done I started working on the bedding for the bed. I had to make the mattress, sheets and pillows.

Bed without the bedding
 I didn't know what I was going to use to make the bedspread and I found out that in the 1930's they used a lot of lace to cover their beds. I got out my hook and started crochet a bedspread for the bed.


I am no expert in crochet but I do know some  basic stitches and the basic afghan pattern. It took me a few days to finish it off but it was worth it.

The bedding


Then it was time to see how the whole room will look together and it couldn't get any better than this. I have added some nice hand painted pieces that I did and also my father which fitted the era.


My Hand painted miniatures

My father's hand painted heater
There is still so much that I still need to add, 

Open Wardrobe

Tall Chest of drawers

dresser

bed and bedside tables
Elizabeth did a fantastic job and she loved how this bed room turned out. My bed room has also been featured on Elf Miniatures facebook page and also on their website. 

I am also pleased that through this project Elf Miniatures now have this new range available on their website.

I wanted to thank Elizabeth  for being fantastic with her clients and giving her very best. Working with her I also got to know her personally. I am looking forward to our next project together.

Well and here are the final pictures.


I hope you have enjoyed this post.

Please keep tuned for our next new project. 

Take Care and See you real soon.

Hugs,


Rebecca xxxx