

Hello Everyone,
Hope you are all fine and that you are set for Christmas. I still can't believe that in a few days Christmas will be here. The kids are quite excited waiting for Santa and his goodies.
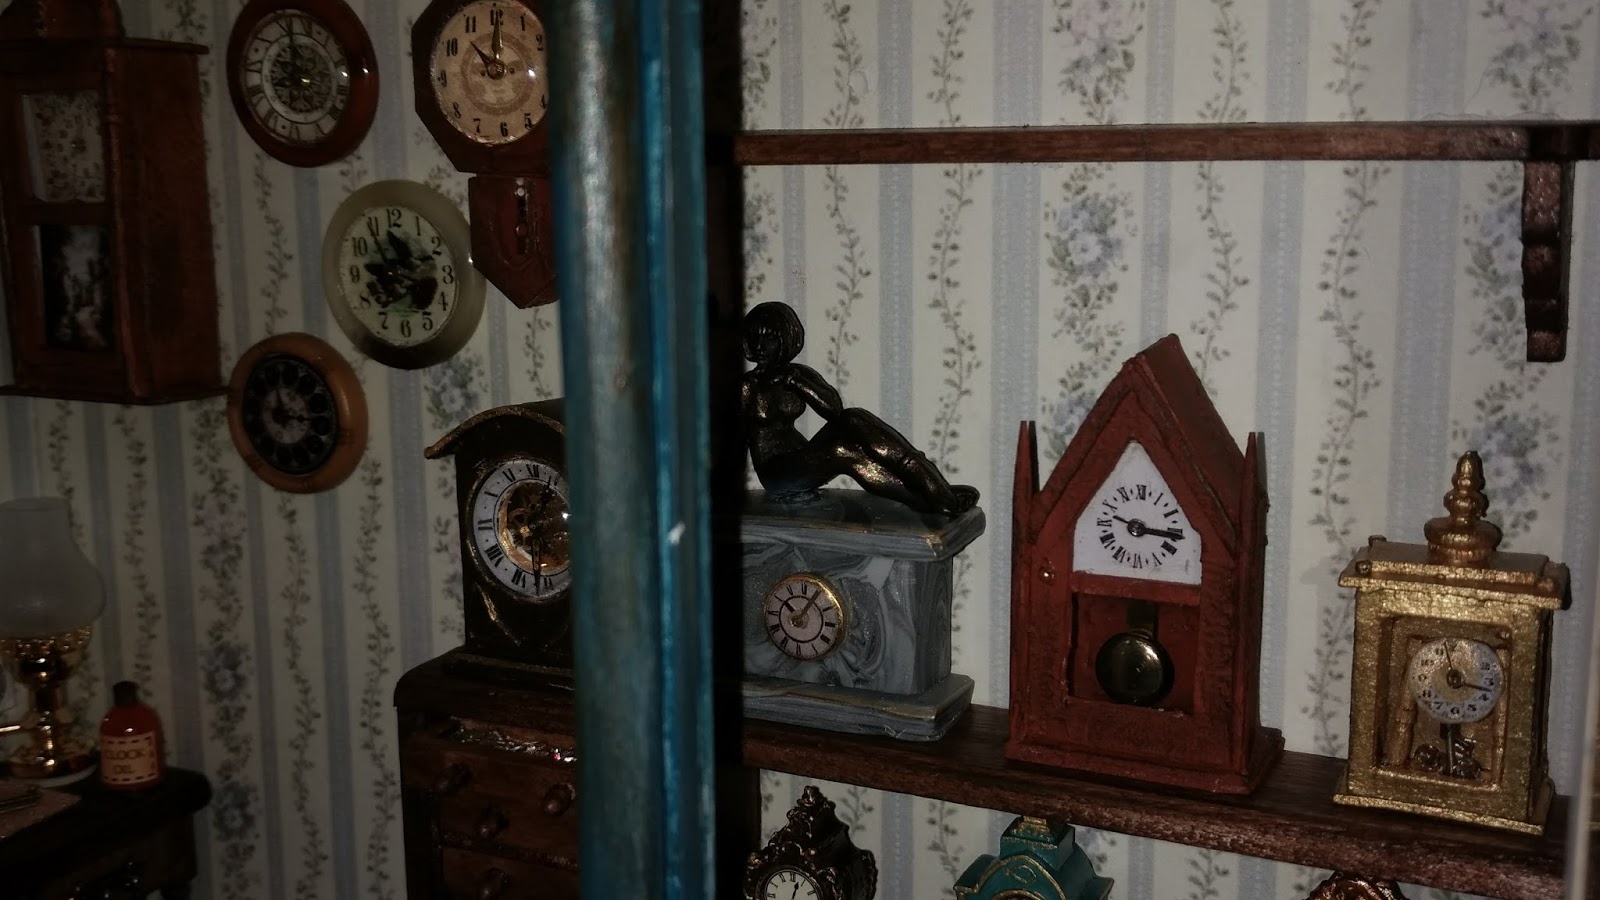
In the mean time, while being busy, I still got to do a few miniatures of my own. I have been working on the small display box which I have turned into a clock shop. There is so much detail that I would like to add to it. I have tried my hand at making miniature clocks. I have to admit I have enjoyed them.

Having a variation of miniature clocks to display is not very easy, especially when you want them to look a bit more realistic than the ones that you find on the market. I had a couple of clocks of my own which I will be using for the shop and one of the clocks that I had was very childish; a piece that I would never use for any dolls house. I gave the wall clock a revamp hoping to give it a chance to be in a miniature project. Luckily for the clock I have managed to give it a makeover.
 |
| The clock before the makeover |
 |
| The clock today. |
Very happy how it turned out, I used cardboard, Real clock hands and also used glass for the face cover.
A few days ago I went to the haberdashery to get some craft supplies and I passed by the button section. Seeing the buttons gave me an idea to make a few wall clocks.
 |
| Buttons to be changed in wall clocks. |
 |
| Wall Clocks made out of buttons |
These clocks have also real clock hands and glass cover. I have down sized a couple of clock faces to fit the buttons and printed them.
I had an idea for a clock and I thought of using one of my hand painted miniature figurines and turn it, into a mantel clock by marbling polymer clay to make the base of the clock. It turned out just right.
 |
| Polymer clay clock |
Using thick card board I made a couple of other clocks. My favorite one is the one where you can see the gears and cogs behind the clock's face. I still can't believe that it turned out so well. I have used very tiny gears for it.


I also made another wall clock using cardboard and weathered it a little. I'm very happy how this turned out.


Finally I have made the last two clocks using cardboard with a total different design to put on the shelf. They came out just right and I'm sure that they will fit in the scene.


I have placed them in the display box just to see how they will look. Most probably they won't remain in the same spot. I have a habit of changing the scene until the last minute.


Hope you like the few clocks that I made. There is still so much that I need to add. but so far it's looking good.
Keep tuned for the next update on this miniature project The Timekeeper's Shop.
Take Care and See You Soon.
Hugs,
Rebecca xxx
Que cantidad de relojes,a cual más bonito,quedan perfectos! gracias por las explicaciones!!!
ReplyDeleteBesos.
Muchas gracias por sus amables palabras. Abrazos xxxxx
DeleteSuch a lovely variety! Your shop is looking beautiful already.
ReplyDeleteThank you so much Megan. I am so pleased that you liked it xxx
DeleteYou did a splendid job creating all these beautiful clocks for your Timekeeper's shop.
ReplyDeleteHugs, Drora
Thank you Drora for you compliments. xxxxxxx
Deletejust lovely.. what a clever girl you are. i can't wait to see your shop..
ReplyDeleteThank you so much Christine. Can't wait to finish it xxxx
DeleteSimply enchanting. Comparing with the watches I made some time ago. . . mine are "blah". . . his are "super WOW !!!!!!!!!!".
ReplyDeleteCongratulations and thank you for opening this blog, it is a show for his eyes to see his work.
Thank you so much Elena for your lovely comments. Don't give up. I'm sure you will manage. xxxx
DeleteVa a quedar una escena deliciosa! Todos tus relojes son geniales aunque si he de elegir uno como favorito, me quedo con ese en el que se ven los diminutos engranajes; es una maravilla!
ReplyDeleteFeliz Navidad, Rebecca!
Muchas gracias. Ese reloj también es mi favorito. Feliz Navidad xxx
DeleteI really love the clocks, but what i love even more is your level of dedication, always willing to walk that extra mile to give your creations that special touch!
ReplyDeleteThank you so much José for your wonderful words. I really appreciate it. They mean so much to me xxx
DeleteWell... Once again one of those "WOW!" moments I get so often as I visit here..
ReplyDeleteGosh I envy your talent and wealth of ideas!
And I'm reserving a first place in line of those who come here to watch and admire your work with mad luster in their eyes going through pictures mumbling "Ooh... I want that.. and that and.. I've GOT to have that..."
Works of art.. There's no other way to put it. That's what they are.
Thanks for letting us admire them - or in my case to drool after them (^^)
Hugs, Irina
Thank you so much Irina for your lovely comments. I'm really pleased that you enjoy my blog. I'm glad that you liked the clocks so much. Hugs xxxx
DeleteQue bonita colección de relojes y que buena idea la de reciclar botones para ellos.
ReplyDeleteUn abrazo
Muchas gracias. Me alegra que te hayan gustado. Abrazos xxx
DeleteYour clocks turned out beautifully! I can't wait to see the finished project. Hope you and your family have a very merry Christmas! Thanks for sharing your projects with us. I always look forward to reading about them.
ReplyDeleteThank you so much Yvette for your wonderful comments. I'm really pleased that you like the blog and the new clocks. I'm looking forward to finish it off. Merry Christmas to you and your loved ones xxxxxxx
DeleteFantástica la colección de relojes y gracias por las ideas con botones . !!
ReplyDeleteGracias por sus amables palabras. xxx
DeleteNice work! Such detailed and intricate artistry.
ReplyDelete